Create and Manage Floor Plans
The Floor Plan feature allows you to upload files that show the interior of a building and to annotate key points of interest with Labels, Text or Images. Additional information to be shared with collaborators and reviewers in the Plan's PDF worksheet can also be included.
In this article, we will explain:
- How to add a Floor Plan to a Plan
- How to edit a Floor Plan
- How to annotate a Floor Plan with Labels, Text or Images
- How to delete a Floor Plan
ADD A FLOOR PLAN
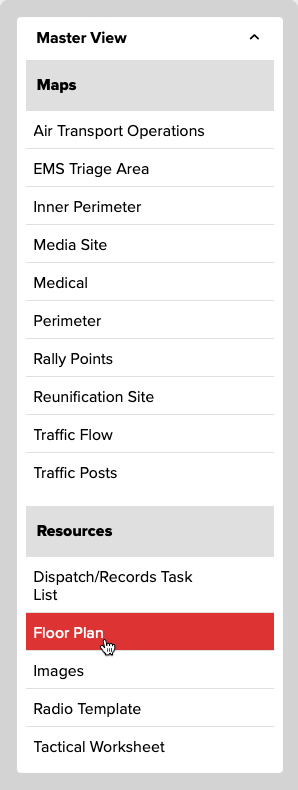
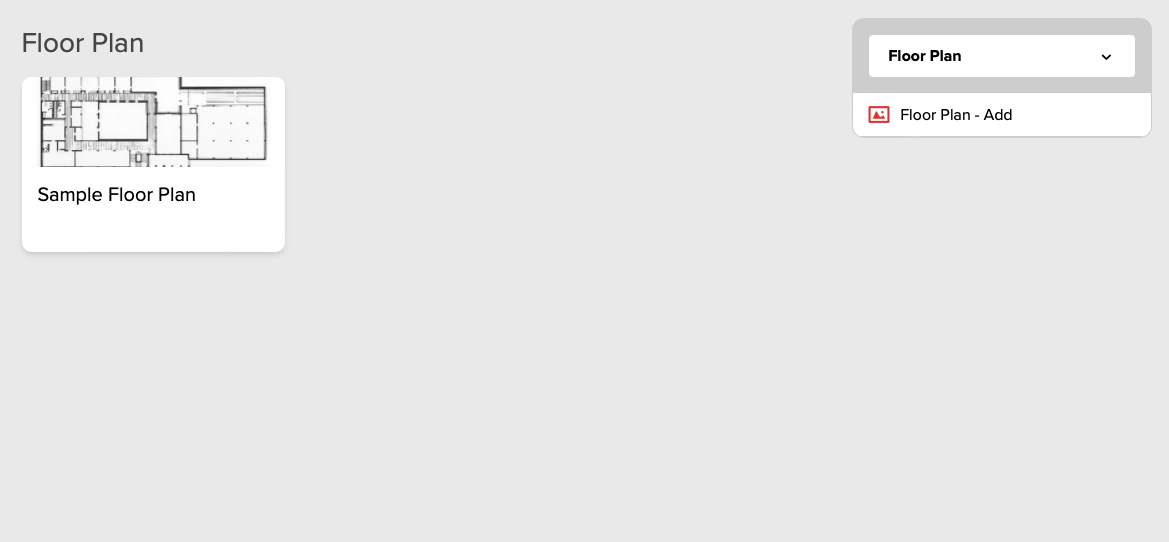
To add a Floor Plan to a Plan, navigate to your desired Plan and click the Master View menu near the upper-right corner of the screen to expand it, then click the Floor Plan menu item (Fig. 1) under the Resources section.
The Floor Plan screen will initially be empty (Fig. 2).
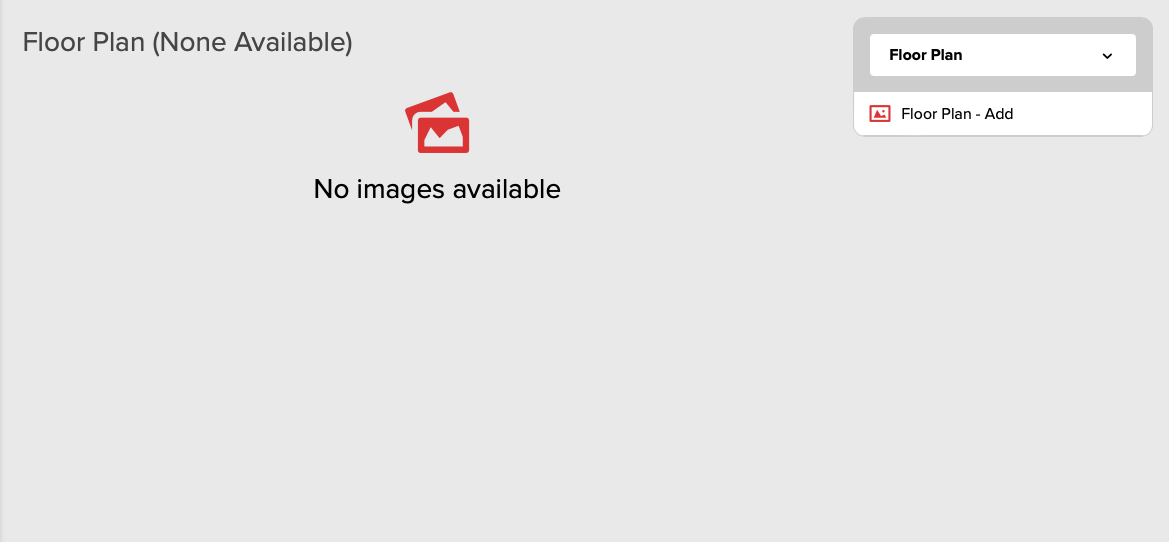
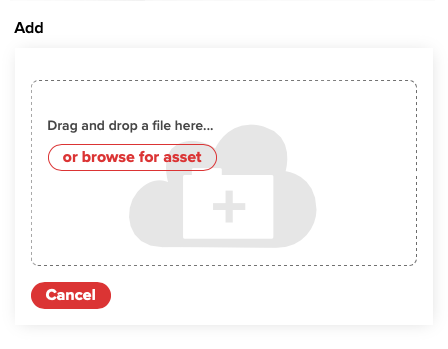
Click the Floor Plan - Add button (Fig. 2, above) near the upper-right corner of the screen, and you will be prompted to either drag and drop or browse and upload an image file from your computer (Fig. 3).
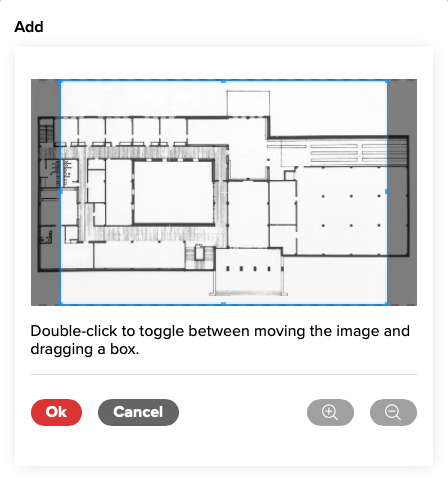
If the image file you are uploading does not fit well within the thin blue frame visible on the Add screen, click the + or - magnifying glass icon to adjust its size (Fig. 4). Click the Ok button when done, then click the Save button on the next screen.
EDIT A FLOOR PLAN
After a Floor Plan has been added, it can be edited. To begin, click the name of the Floor Plan on the Floor Plan screen (Fig. 5).
After clicking a Floor Plan, you will see the Edit Floor Plan screen (Fig. 6).
NOTE: You may need to scroll down past the image of your Floor Plan to see the editing options.
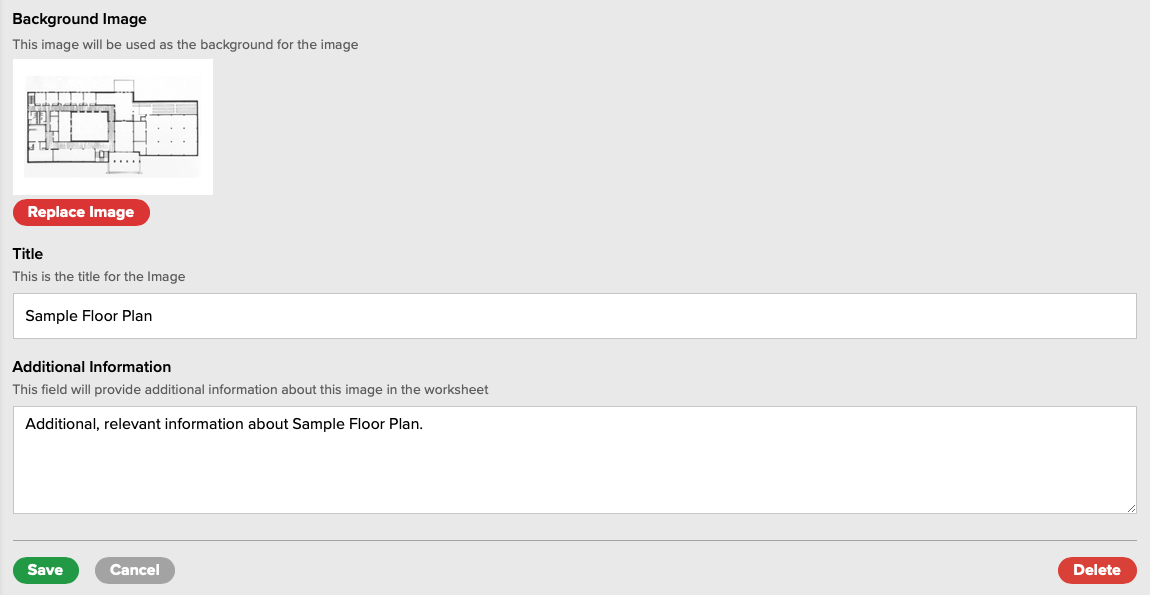
On this screen, you can Replace the Floor Plan's image, add a Title and add Additional Information (which will be displayed in a Plan's PDF worksheet). Click the Save button when done.
ANNOTATE A FLOOR PLAN
To Annotate a Floor Plan, first click its name on the Floor Plan screen (Fig. 5, above) and the Edit Floor Plan screen will be displayed. Using the Images Editor - Annotate menu (Fig. 7) toward the upper-right of the screen, you will be able to Annotate the Floor Plan using Labels, Text and other Images.

To annotate with a Label — which will be connected to an arrow pointing to a point of interest on the Floor Plan — first click on Labels in the Images Editor - Annotate menu (Fig. 7, above), then click Create Label. A New Label will appear in the list (with edit options) and on the Floor Plan. Click the New Label on the Floor Plan to display its move handles (Fig. 8).
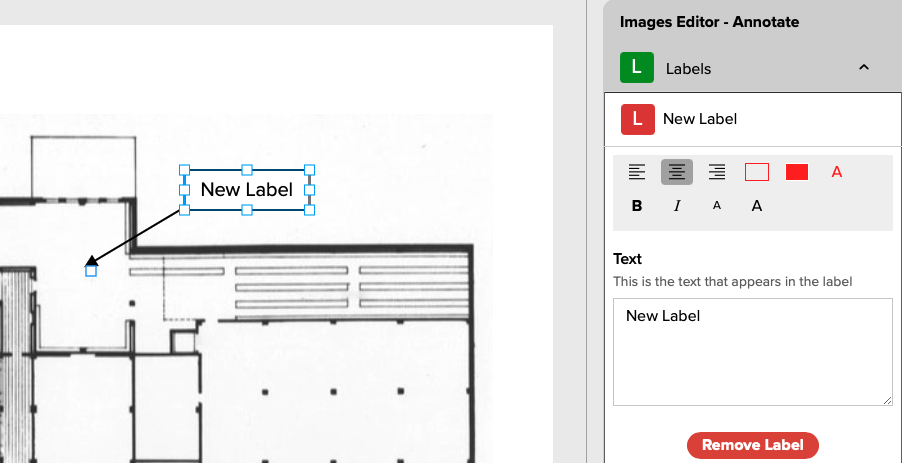
To move the Label or its arrow, click and hold on either while the light blue move handles are displayed, then drag the label or arrow to the desired location and release. To resize the label click on any of the light blue handles and move them.
To change the text that is displayed on the label, edit it in the field in the Images Editor - Annotate menu (Fig. 8, above). The alignment, size, formatting (bold, italic) and color of the text can also be edited, as well as the background color and border (stroke) of the label and arrow. Click the Remove Label button to delete it from the Floor Plan.
Click the name of the label in the Images Editor - Annotate menu to collapse the menu when done.
To annotate with Text, click on Texts in the Images Editor - Annotate menu (Fig. 7, above). New Text will appear in the list (with edit options) and on the Floor Plan. Click the New Text on the Floor Plan to display its move handles (Fig. 9).

To move the Text, click and hold on it while the light blue move handles are displayed, then drag it to the desired location and release. To resize the text click on any of the light blue handles and move them.
To change the text that is displayed, edit it in the field in the Images Editor - Annotate menu (Fig. 9, above). The alignment, size, formatting (bold, italic) and color of the text can also be edited, as well as its background color and border (stroke). Click the Remove Text button to delete it from the Floor Plan.
Click the name of the text in the Images Editor - Annotate menu to collapse the menu when done.
To annotate with an Image, click on Images in the Images Editor - Annotate menu (Fig. 7, above). New Image will appear in the list. Click the Add Image button and you will be prompted to either drag and drop or browse and upload an image file from your computer (Fig. 10).
The uploaded image will appear on the Floor Plan (Fig. 11). To move the Image, click and hold on it while the light blue move handles are displayed, then drag it to the desired location and release. To resize the image click on any of the light blue handles and move them.
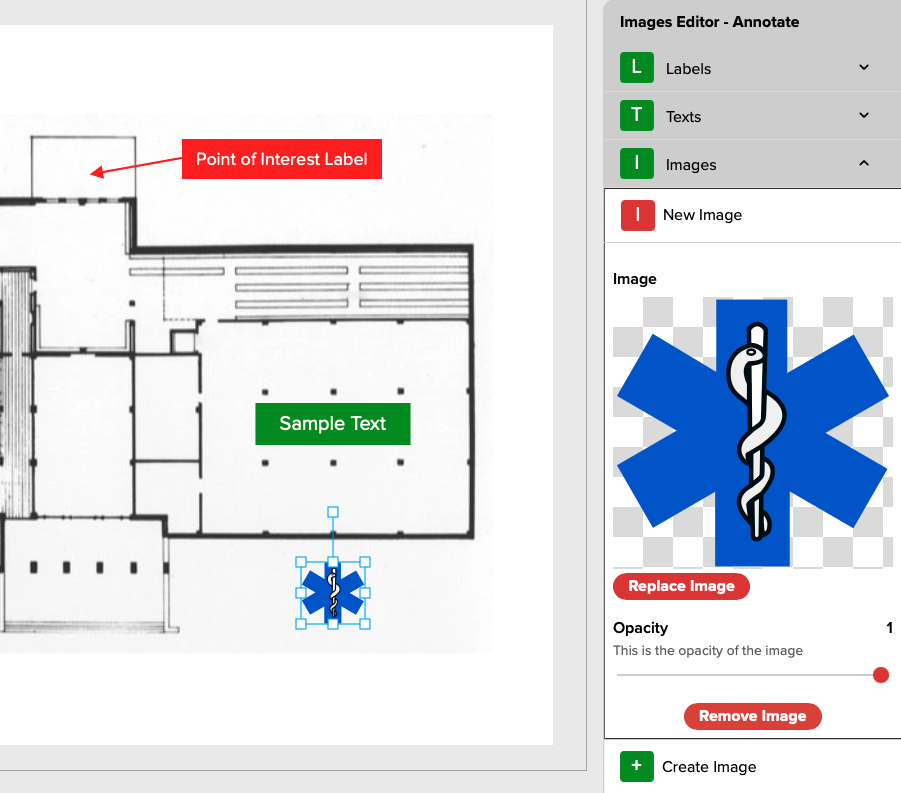
To change the image that is displayed, click the Replace Image button in the Images Editor - Annotate menu (Fig. 10, above). The opacity of the image can be adjusted using the slider. Click the Remove Image button to delete it from the Floor Plan.
Click New Image in the Images Editor - Annotate menu to collapse the menu when done.
DELETE A FLOOR PLAN
To Delete a Floor Plan, first click its name on the Floor Plan screen (Fig. 5, above).
After clicking a Floor Plan, you will see the Edit Floor Plan screen (Fig. 6, above).
NOTE: You may need to scroll down past the image of your Floor Plan to see the editing options.
Click the Delete button near the lower-right corner of the screen and then confirm deletion.