Create a Plan and Place Pins
Plans allow you to display a satellite map, floor plan or other resource with vital, annotated action points and supplementary information throughout incident coverage zones. Before creating any Plans, you will need to Create a Project to contain them.
In this article, we will explain:
- How to create a Plan
- How to select and edit a Plan's Map and Resources
- How to add and edit Pins on a Plan's Map
- How to move Pins on a Plan's Map
CREATE A PLAN
To create a Plan, click on your Project from the Portal Landing Page and click the Create Plan button (Fig. 1) near the upper-right corner of the screen.

When creating a Plan, a single location must be determined for the mapping system. From the Create Plan page (Fig. 2) you can:
- Enter the Plan's Location
- Enter the Plan's Title
- Adjust your zoom settings by clicking on the plus or minus buttons
- Adjust the position of the map by clicking and holding, then dragging the map
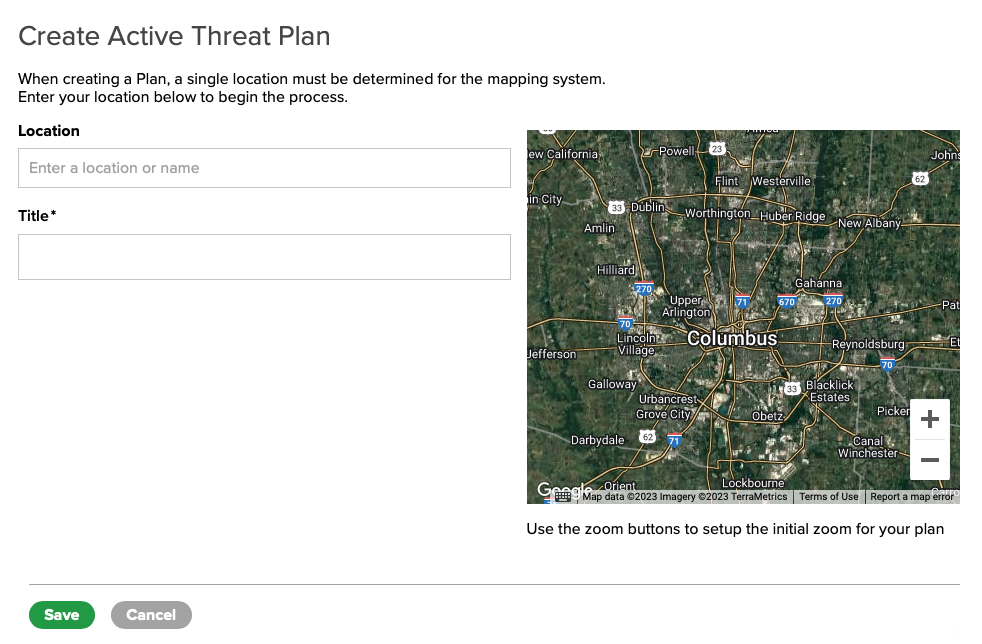
Once complete, click the Save button.
SELECT AND EDIT A PLAN'S MAP OR RESOURCES
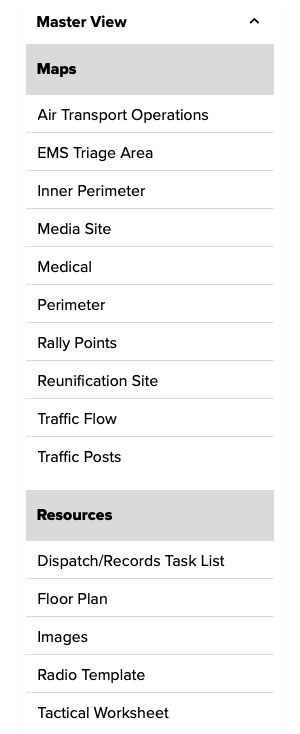
Once your Plan has been created, use the Master View / Maps & Resources drop-down menu (Fig. 3) near the upper-right corner of the page to create and customize your plan.
Select a Map and populate with Pins: When creating your Plans, you will select a Map. A Map is similar to a template and each Map has a collection of Pins to meet your objectives. Pins are action points placed on a specific geographic location. Community Partner Agencies – such as Fire or Law Enforcement – can be assigned to Pins, and supplemental information can be added. Custom Maps and custom Pins can easily be created to fit your needs. To learn more, visit Create and Manage Maps and Create and Manage Pins.
Select a Resource and populate with content: Resources such as Dispatch/Records Tasks, Floor Plans, Images, Radio Templates or Tactical Worksheets can be included in a Plan. Clicking on the any of these options will take you to a page to to populate it with your custom content.
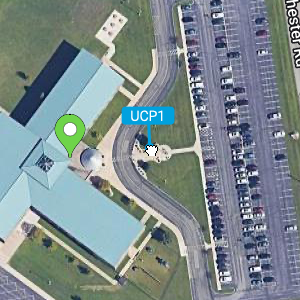
ADD PINS TO A PLAN'S MAP
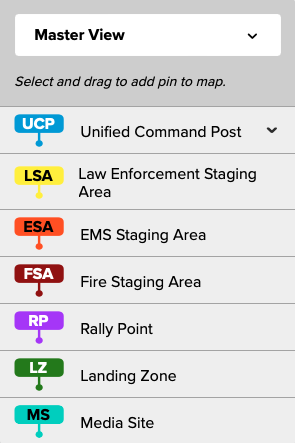
To add a Pin to a Plan's Map, drag any Pin from the menu (Fig. 4) to the right of the Map directly onto the map and drop it into position. Multiple pins of the same type may be added.
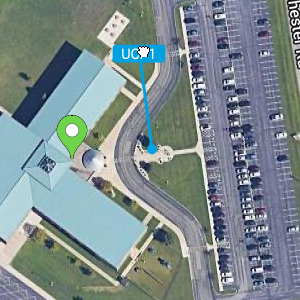
To edit a Pin, simply click it on its informational Flag to display the Edit Pin screen (Fig. 5). Enter a Pin Title, select the Assigned Agency and enter Additional Information.
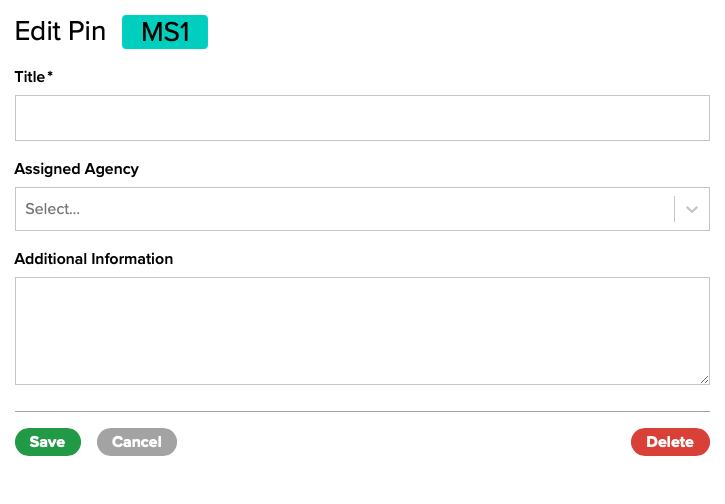
Once complete, click the Save button.
MOVE PINS ON A PLAN'S MAP
Both Pins and their informational Flags can be moved anywhere on the main section of the Map. For example, you may need to place a Pin and then move its Flag out of the way so a detail (such as a particular buidling) on the map is still visible to users.
To move a Pin, move your mouse cursor over it and click and hold — the pin can then be dragged to any location on the map. Release the mouse button after reaching the desired position to drop the Pin.
To move a Pin's informational Flag, move your mouse cursor over it and click and hold — the Flag can then be dragged to any location on the map. Release the mouse button after reaching the desired position to drop the Flag.