Share Links
Share Links are a very powerful add-on for your StrataSite™ Portal. If you are interested in adding Share Links but do not see the option in your Portal, please reach out to your StrataSite representative.
After completing a Plan, you will probably need to share important information from it with people or organizations who do not have access to your portal. In addition to distributing Plan PDFs to everyone, which may include a lot of information that is not needed by all of the recipients, you can also generate tailored Share Links for specific groups that contain only the information each group needs.
If your organization or a partner organization has a mass notification system, Share Links are a great way to get targeted information (e.g. Medical or Reunification Sites) to everyone who needs it. Share Links are readily displayed in a web browser on most mobile computing devices.
In this article, we will explain:
• How to create a new Share Link
• How to edit an existing Share Link
• How to copy a Share Link to your computer's clipboard for distribution
• How to delete a Share Link
CREATE A SHARE LINK
To create a Share Link, navigate into the Project that contains the Plan with the information you would like to share.
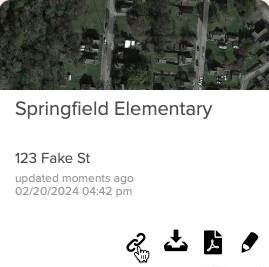
Click the Share Link icon (Fig. 1) near the center of the bottom of the Plan's card.
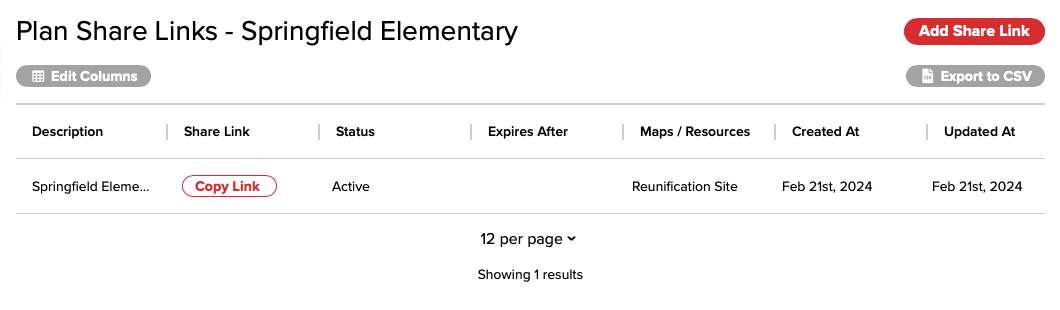
If no Share Links have yet been created, you will see the Create Share Link button (Fig. 2). If the Plan already has at least one Share Link, you will see the Plan Share Links screen with Add Share Link button (Fig. 3).

After clicking either the Create Share Link (Fig. 2, above) or Add Share Link button (Fig. 3, above), the Create a Share Link screen will be displayed (Fig. 4).
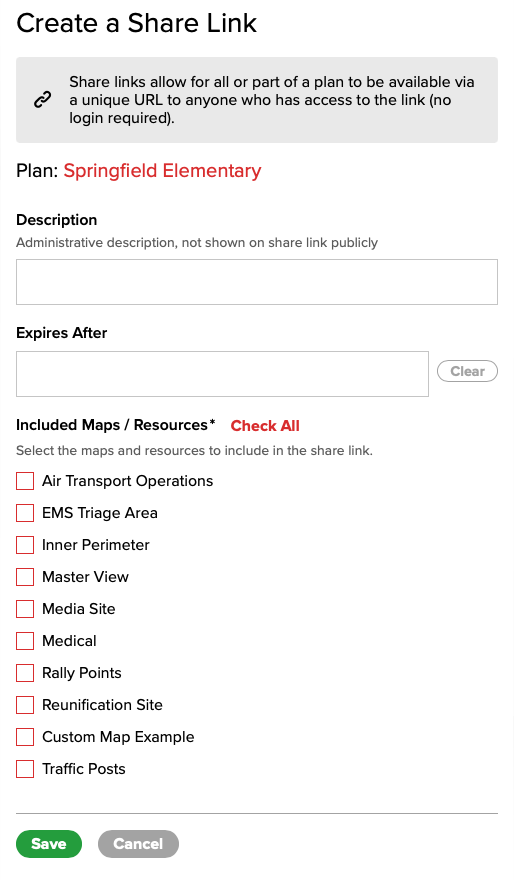
Enter a description (which will only be seen by Portal users, not recipients of the Share Link), and an optional Expires After date for the Share Link. After that date the Share Link will no longer be functional. Check the boxes for all of the Maps that should be displayed in the Share Link. This list will include all of the Portal's default Maps as well as any custom Maps that have been created.
Click Save when done.
EDIT A SHARE LINK
To edit a Share Link, navigate into the Project that contains the Plan with the Share Link you would like to edit.
Click the Share Link icon (Fig. 1, above) near the center of the bottom of the Plan's card.
Click the name of the Share Link you would like to edit in the Plan Share Links screen (Fig. 3, above) and the Edit Share Link screen will be displayed (Fig. 5).
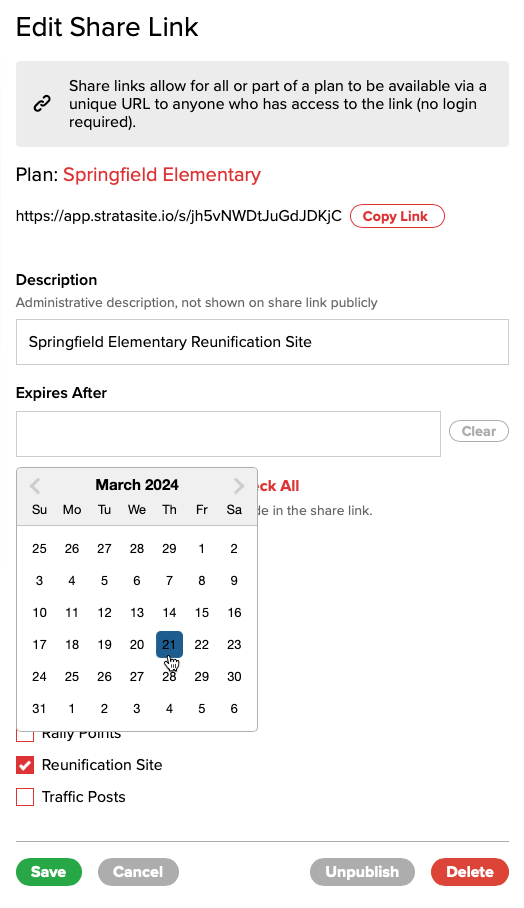
Edit the Description, Expires After date and included Maps as needed, then click the Save button when done.
COPY A SHARE LINK FOR DISTRIBUTION
To copy a Share Link to your computer's clipboard for distribution, navigate into the Project that contains the Plan with the information you would like to share.
Click the Share Link icon (Fig. 1, above) near the center of the bottom of the Plan's card.
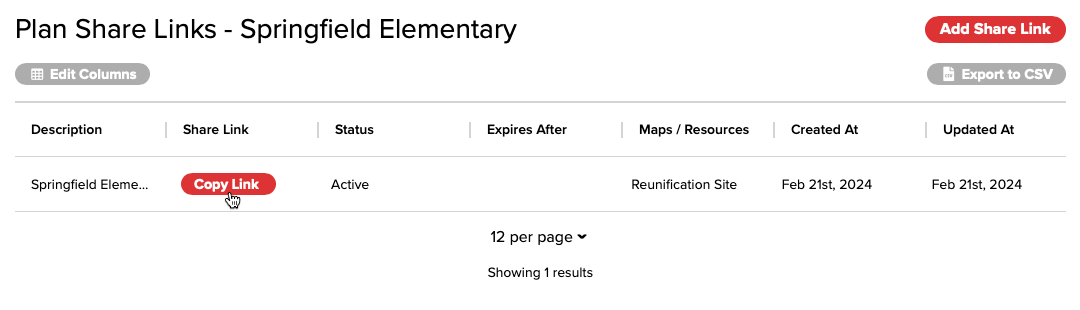
On the Plan Share Links screen (Fig. 6) that is then displayed, click the Copy Link button and the Share Link will be copied to your computer's clipboard to be pasted in an e-mail message or other document for distribution.
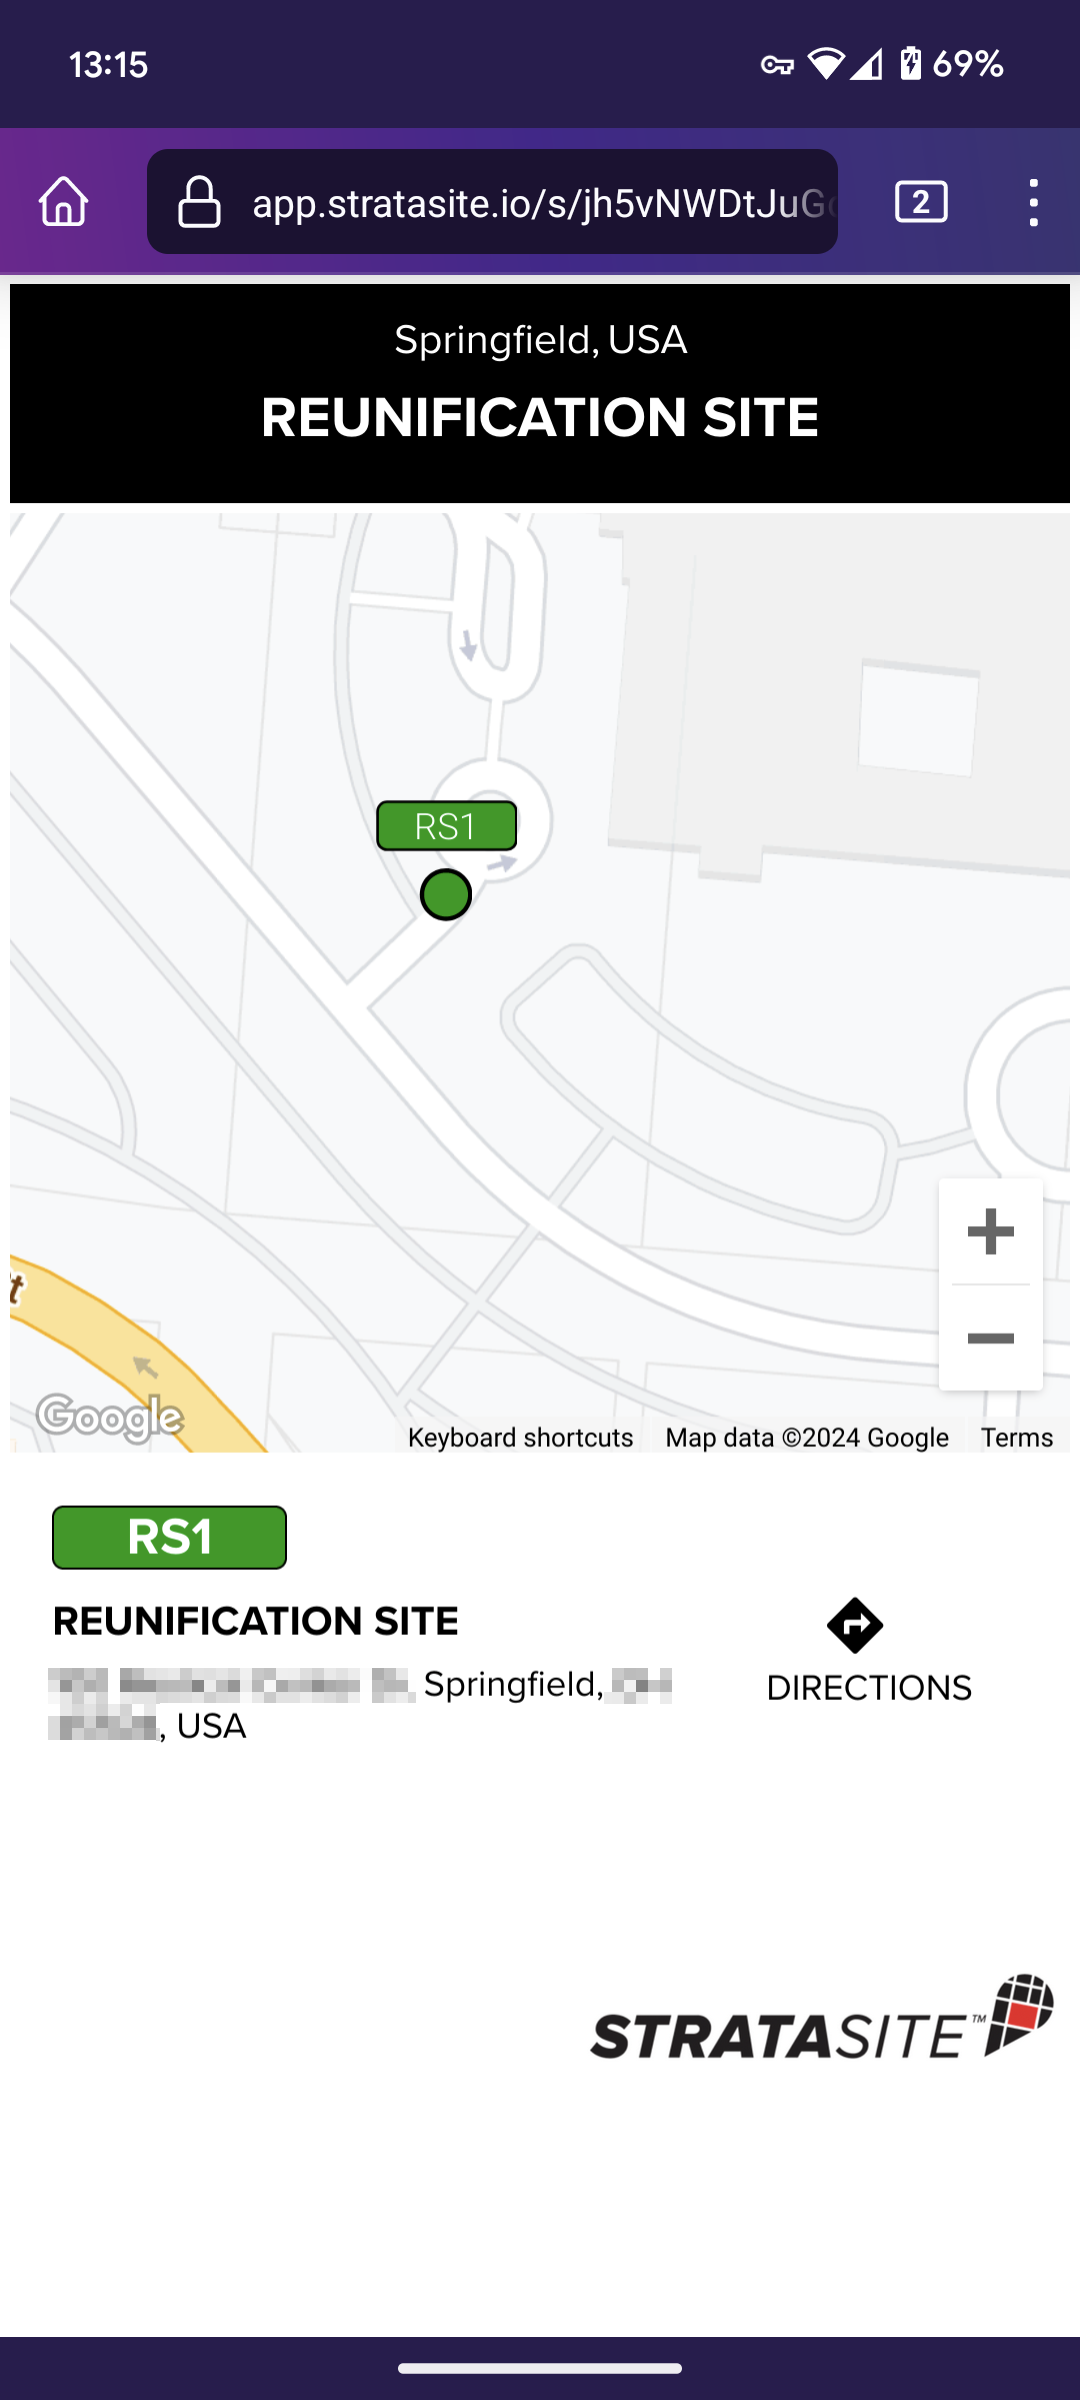
After the Share Link has been distributed, recipients can view the information in any modern web browser (Fig. 7).
DELETE A SHARE LINK
To delete a Share Link, navigate into the Project that contains the Plan with the Share Link you would like to delete.
Click the Share Link icon (Fig. 1, above) near the center of the bottom of the Plan's card.
Click the name of the Share Link you would like to delete in the Plan Share Links screen (Fig. 3 or Fig. 6, above) and the Edit Share Link screen will be displayed (Fig. 5, above).
Click the Delete button near the lower-right corner and confirm deletion.